PrestaShop multistore: how is it arranged and what's this?
What is a multistore?
Such a feature of the PrestaShop system as a «multistore» system is rightfully considered one of the most important in the generation of new versions, among those that are responsible for controlling several stores using the back-office. This feature allows the administrator to manage stores that share common components and features. To improve and optimize the function, the developers took care of introducing the function of creating a group of stores. To enable multistore you don't need to install some PrestaShop modules — this is a basic feature. Also, multistore allows creating some different shops with different PrestaShop themes.
What is the purpose of a multistore at PrestaShop?
It is possible, due to the presence of the above function, you will want to use it, but in reality, it will not at all belong to the list of necessary ones. If the site owner wants his resource to be multilingual and accessible to users in different languages, or currencies, then you are better off using a special template for different graphic designs, divided into categories.
Multiple Stores (several stores) is a functionality that allows you to have several stores on different domains/subdomains with one Prestashop admin panel. This is convenient when you intend to sell the products on different sites and at the same time track all orders in one place.
How to enable & configure multistore?
In order to create several online shops from your resource, you need to perform the following sequence of actions:
- Login into the admin panel;
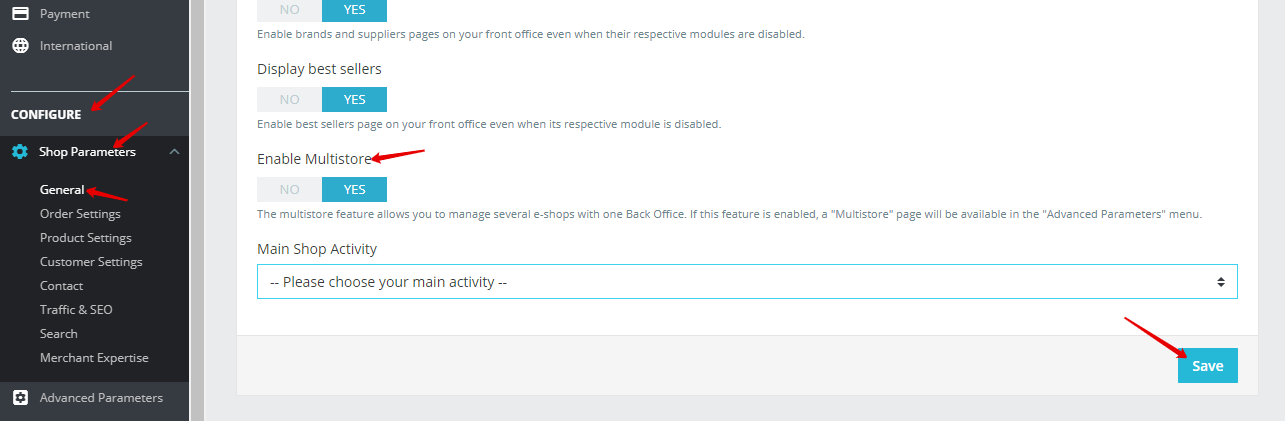
- Next, go to the «Configure» section and press on the «Shop parameters — general» tab;
- Press on the activation of the «Enable multi-store» option;
-
Remember to save all the changes.
The next step is to make a new store group and create a new store. Let's take a closer look. Now let's move on to «Configure — Advanced parameters — Multistore» tab:
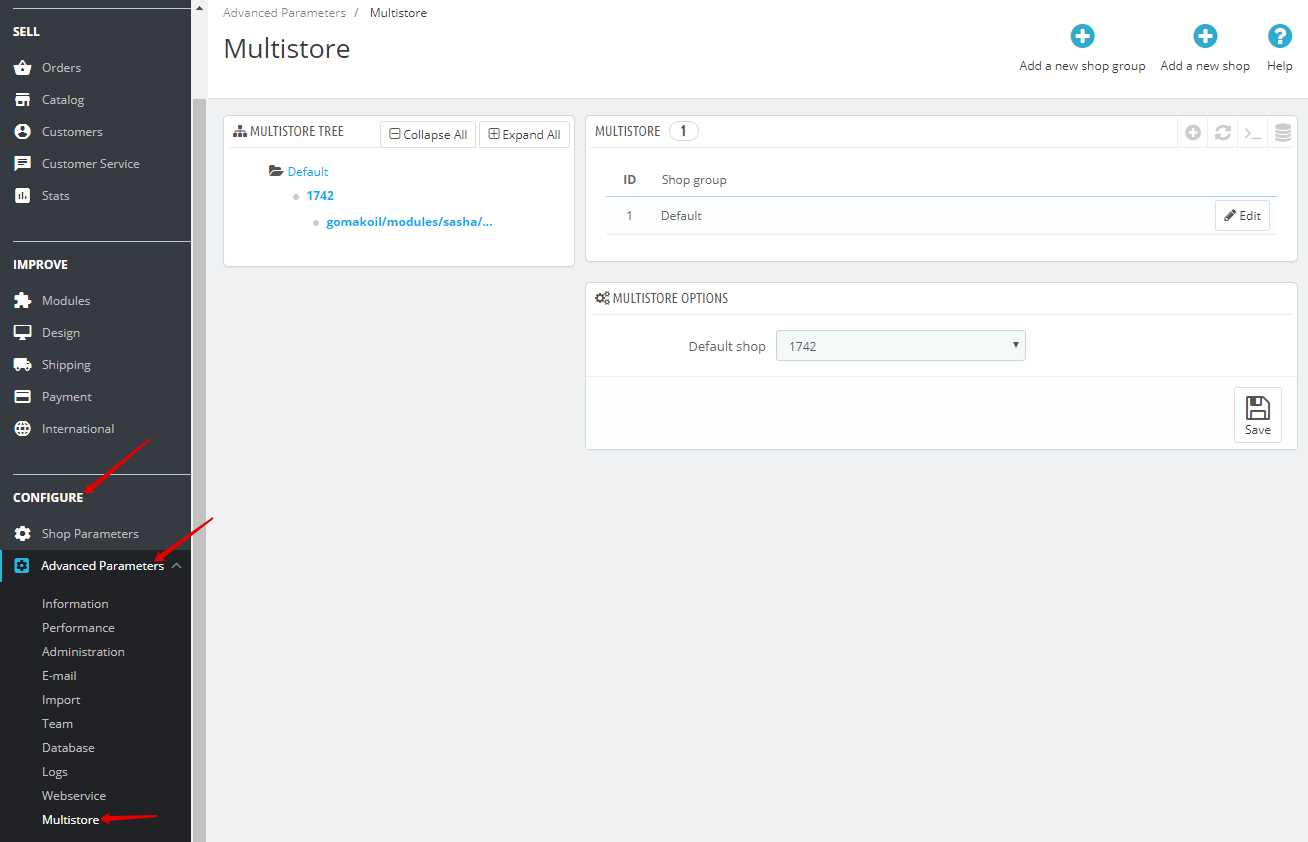
Press on the «Add a new shop group» button to create a new group:

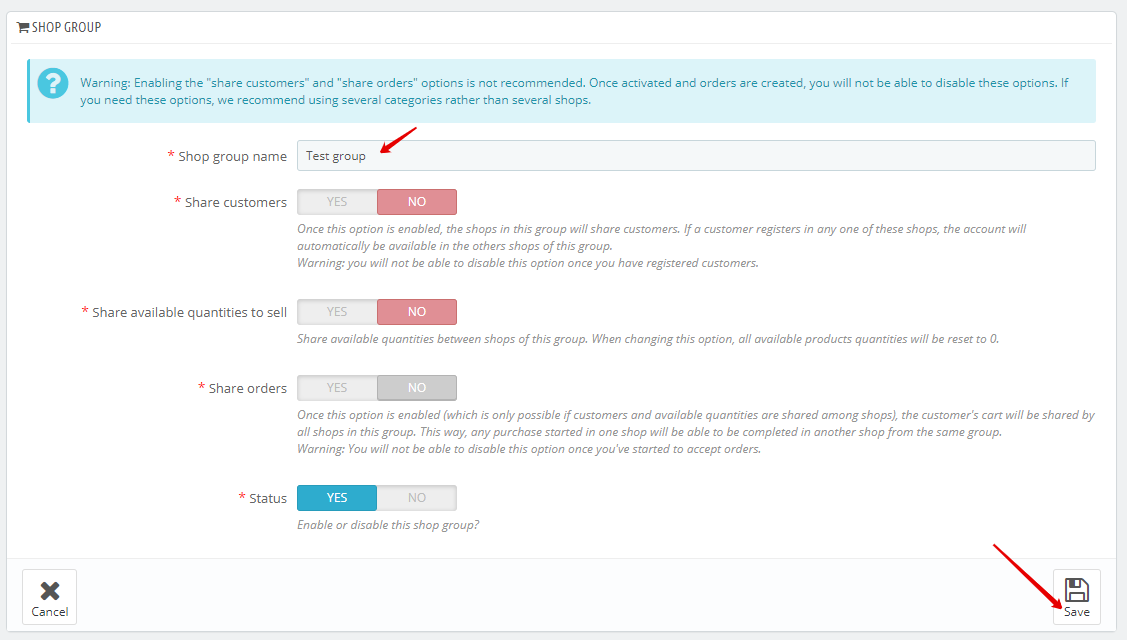
Indicate the name of the group and enable the options you need. The following options are available:
-
Share customers — allows buyers to use the same login details for all stores in the group;
- Share available quantities to sell — allows all stores to have a total number of items for sale;
- Share orders — (if selected as «yes», then it is no longer possible to change. Use this option if the two previous ones are also selected as «yes») allows customers to see orders from all stores in one account.
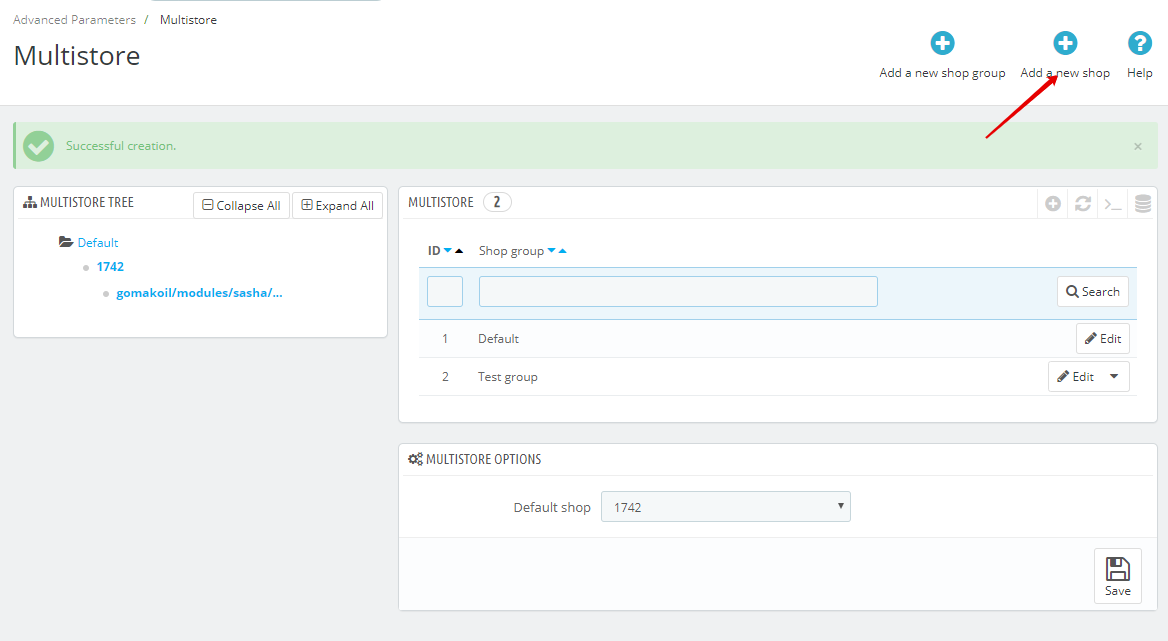
After creating the group, let's move to make a new store. Press the «Add a new shop» button:
Enter the name of the store and carefully study the additional options. Description of available options:
- Shop group — select a newly created group;
- Category root — selects the root category of the store;
- Associated categories — allows you to specify the available categories for the store;
- Theme — select a template.
The next tab is «Import data from another shop» which allows importing data&features from the previous shop. Don’t forget to save changes!

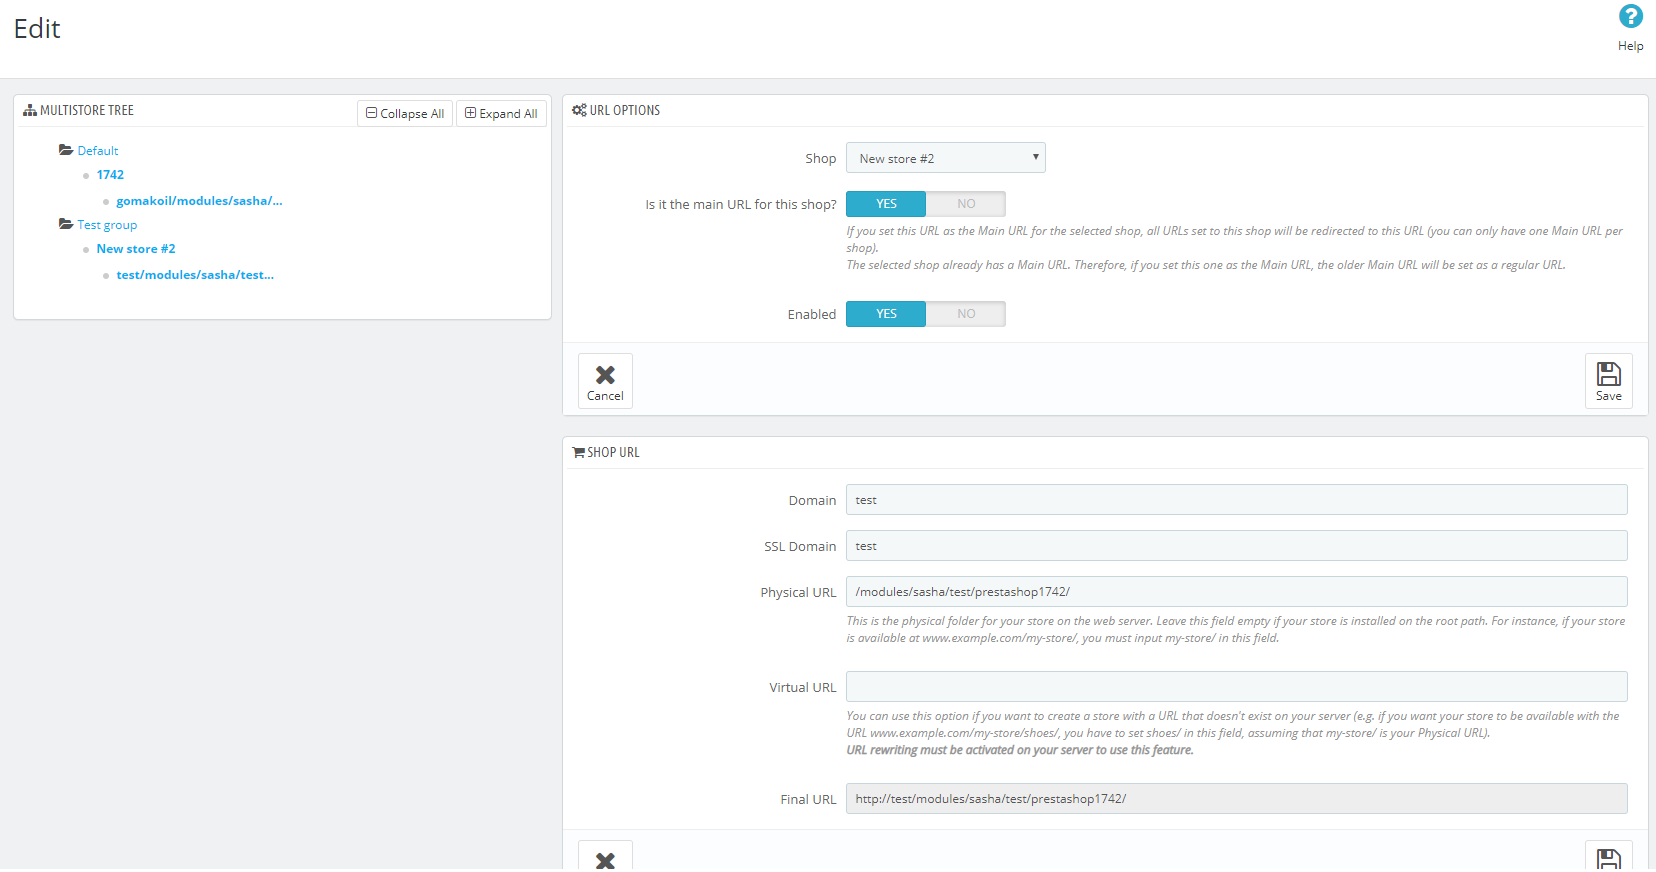
After successfully creating the store, we see the following picture. Click on the «Main URL for this shop» link:

We need to fill out and check the available fields, such as status, certificate link, physical address, server. Remember to save the changes:
Conclusion
As we can see, managing a multistore in a PrestaShop — is very simple and at the same time very functional and flexible to configure. PrestaShop Modules, themes, and services will help you expand the functionality of the store, and if you have a non-standard question, our specialists are ready to help you. To view our products, go to the myprestamodules.com. See you!
Category
- Prestashop 1.6 [7]
- Tutorials & Tips [24]
- PrestaShop 1.7 [5]
- Ecommerce News [7]
- Free Modules & giveaway [1]
- Sales & Discounts [10]