How to configure a PrestaShop store after installing
Successfully installing PrestaShop, you need to open the admin panel. You will not come across a large number of settings since all the main ones are already running by default. This is a great advantage of Prestashop over other CMS, such as WordPress or Joomla, which require the installation of special add-ons for doing e-commerce. However, some customization still has to be done.
Built-in documentation and Demo in the admin panel.
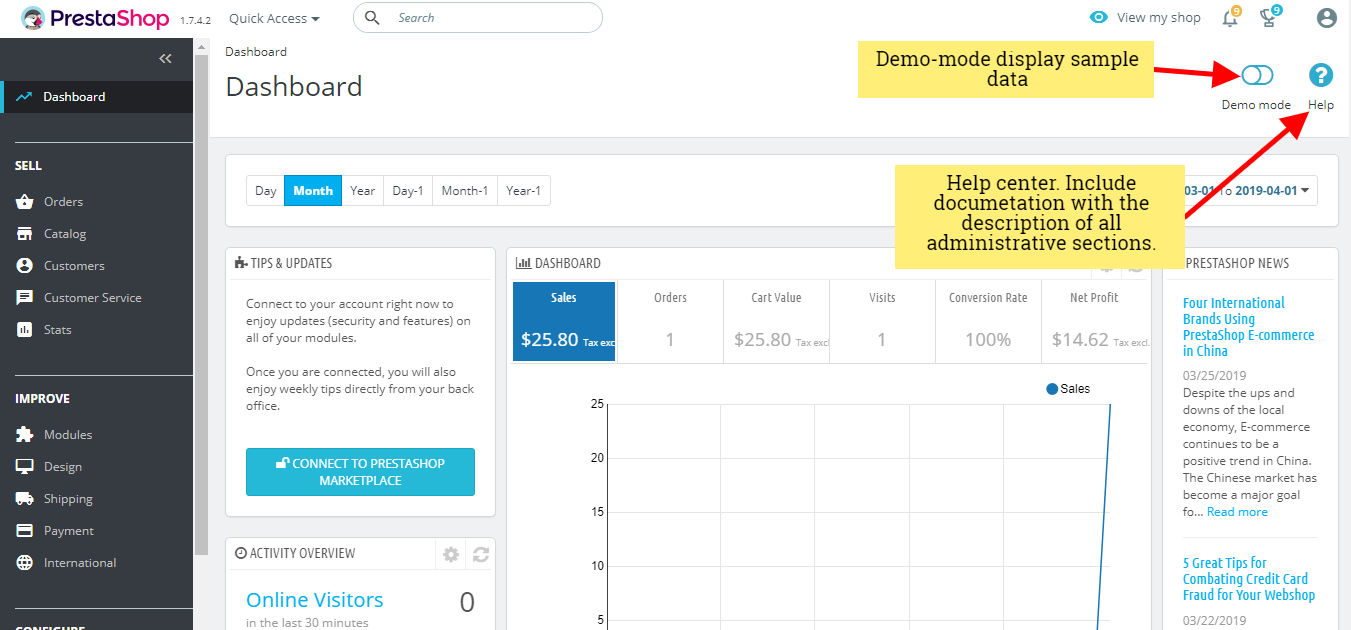
In the upper right corner, you can see the button with the Demo-mode and a Help Center button. Demo-mode displays sample data & you can see your dashboard with different numbers. I the Help Center you can see articles that describe each item in the admin menu.
Store configuration and parameters.
To configure, we will find the section «CONFIGURE» in the left menu of the admin panel:
.png)
Click to «Shop Parameters» and select options to configure. There are several sub-items that are responsible for different blocks and their settings:
- General;
- Order Settings;
- Product Settings;
- Customer Settings;
- Contact;
- Traffic & SEO;
- Search;
- Merchant Expertise.
.png)
Let's look at the functionality of each item in more detail.
General. We have two tabs: General and Maintenance.
The maintenance mode will be useful when the site is not ready yet or you want to restrict access to the site while making some changes. Also, you can add your IP-address to get full access to the front office even if the shop is disabled.
In the General tab we have:
- Enable SSL(Secure Sockets Layer);
- Increase front office security (Enable or disable token in the Front Office to improve PrestaShop's security);
- Allow iframes on HTML fields;
- Clean the HTML content on text fields (We recommend that you leave this option enabled);
- Display brands, suppliers, bestsellers;
- Enable multistore;
- Choose the main shop activity.
Order Settings. We have two tabs: Order Settings & Statuses.
Setting up the "Order" section refers to orders made by your buyers, as well as other details. Availability of different order statuses or returns allows you to easily manage your orders and returns, as well as inform your buyers about the status of their orders. On the Status page, we see statuses and can edit them.
Product Settings. We have two tabs: Order Settings & Statuses.
This page contains display settings that relate to how our products will be displayed. That is, the options related to the product page.
Customer Settings.
Includes your buyer's preferences. It brings together specifically customer-related options, most notably the B2B-model. Also, the platform allows to giving your buyer's certain privileges, by assigning to groups. You can easily create groups and assign a user to different groups.
Contact.
The «Contact» page in our online store displays a contact form for contacting buyers with the administration. You can create multiple accounts, such as customer service, sales, support, etc. You can also access the existing contact list on the Contacts page.
Traffic & SEO.
The tools and settings on this page will help you to improve the presence of your PrestaShop store on the search results pages, thereby increasing the attendance of your site.
Search.
The «Search» page allows to enable you to configure your store search features.
Merchant Expertise.
This page is generated by a module that has been specifically designed to help users track their development as e-commerce and see how they grew or advanced over a period of time.
The next step in setting up your store is the "Advanced Options" item:
.png)
Here we can see data from our web server, manage performance, set up automatic updates, manage your COOKIE files, view mailing list information, manage shop members and provide them with permissions, open a SQL database manager, create queries, and view log entries.
All these feature descriptions will help you quickly and easily set up your new store. You can also ask for help in solving any issue on our forum.
Category
- Prestashop 1.6 [7]
- Tutorials & Tips [24]
- PrestaShop 1.7 [5]
- Ecommerce News [7]
- Free Modules & giveaway [1]
- Sales & Discounts [10]