How to use custom formulas
Using formulas is an important tool to generate the report you need for your orders. In this module, we implemented the option of adding your own formulas using template fields. You can also add a static field with the name and value you want. If you need to create a new field with a customs value, create it manually. You can create as many formula fields as you need. How does it work?
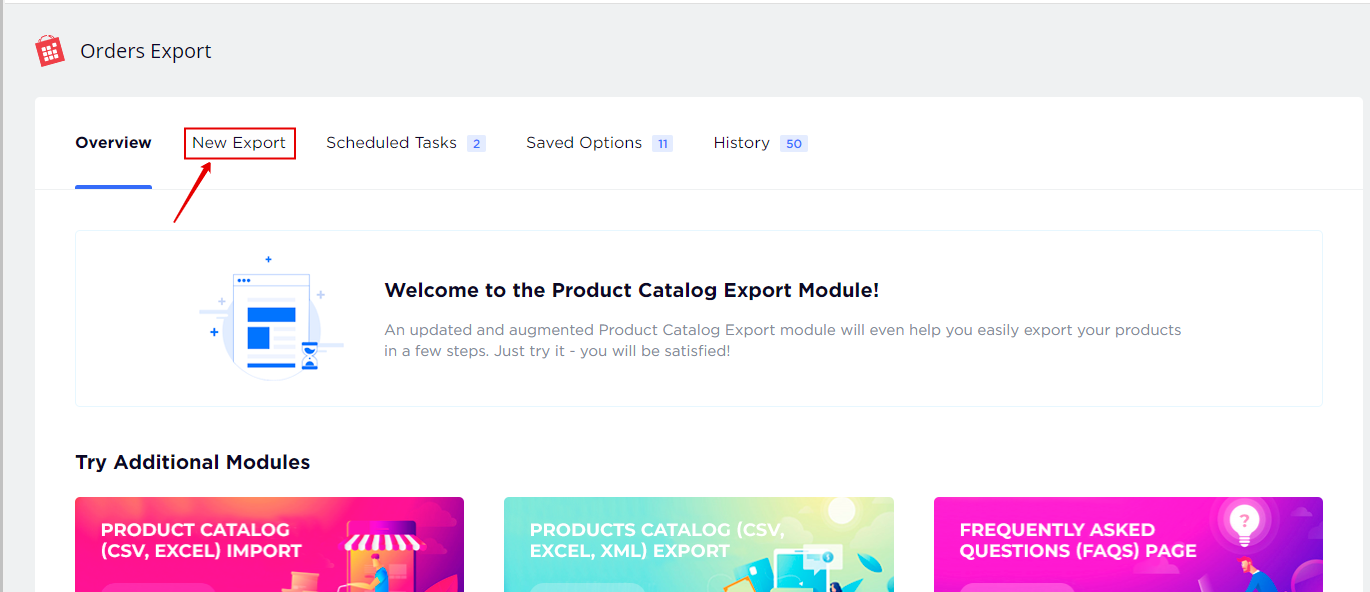
Click the «New Export» button:
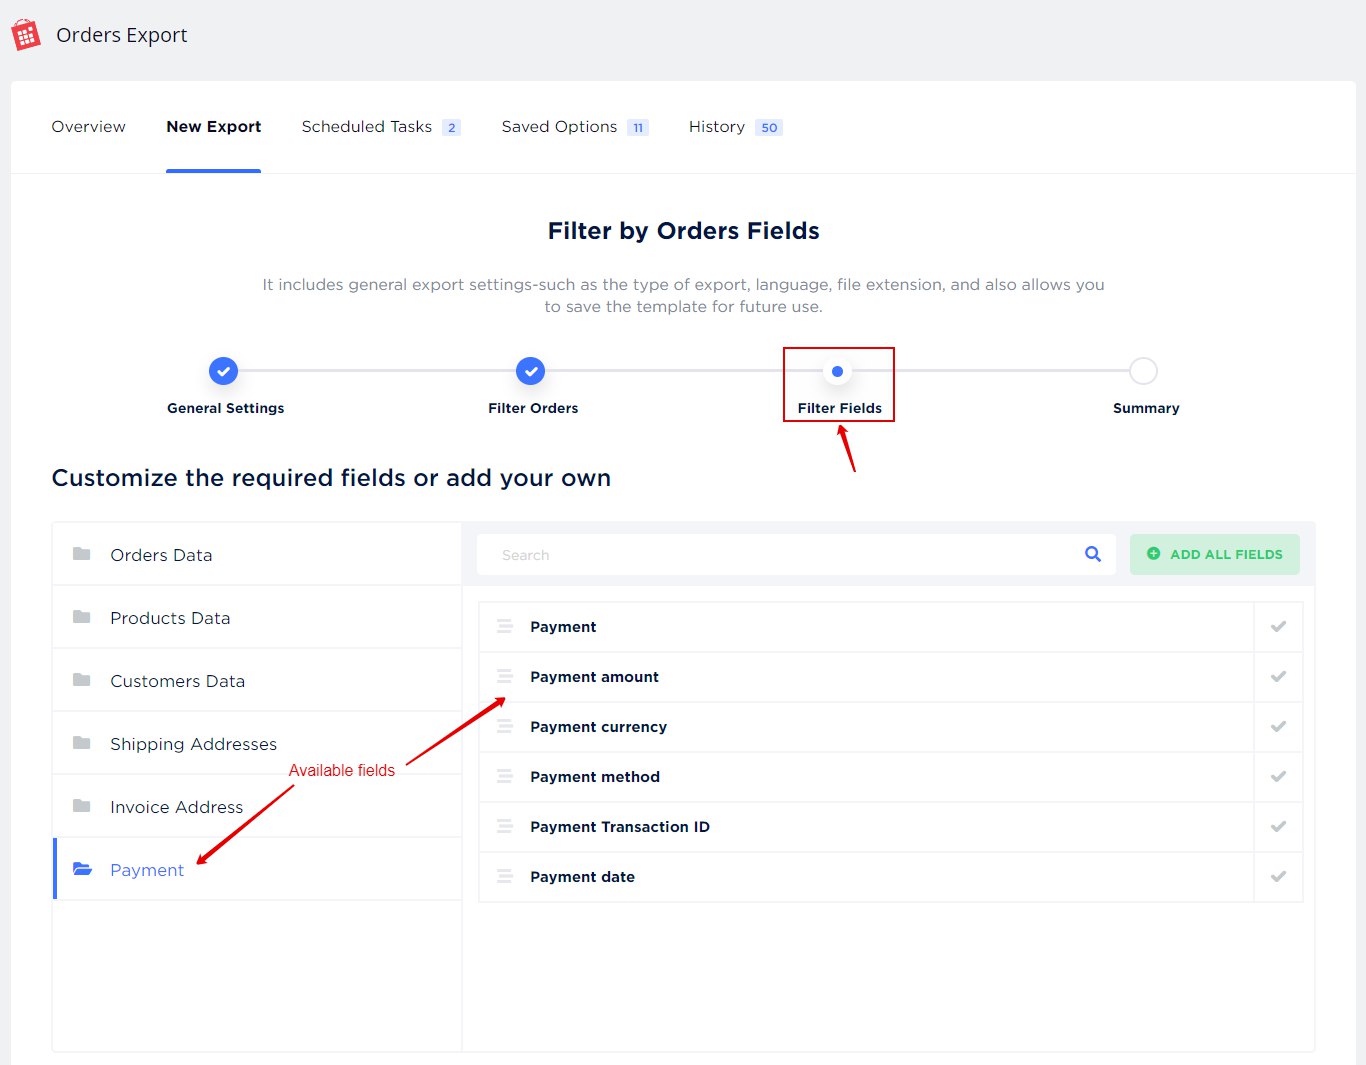
Select the options you need in the first and second steps to configure the export. Going to step # 3, you will see a list of fields available for export:
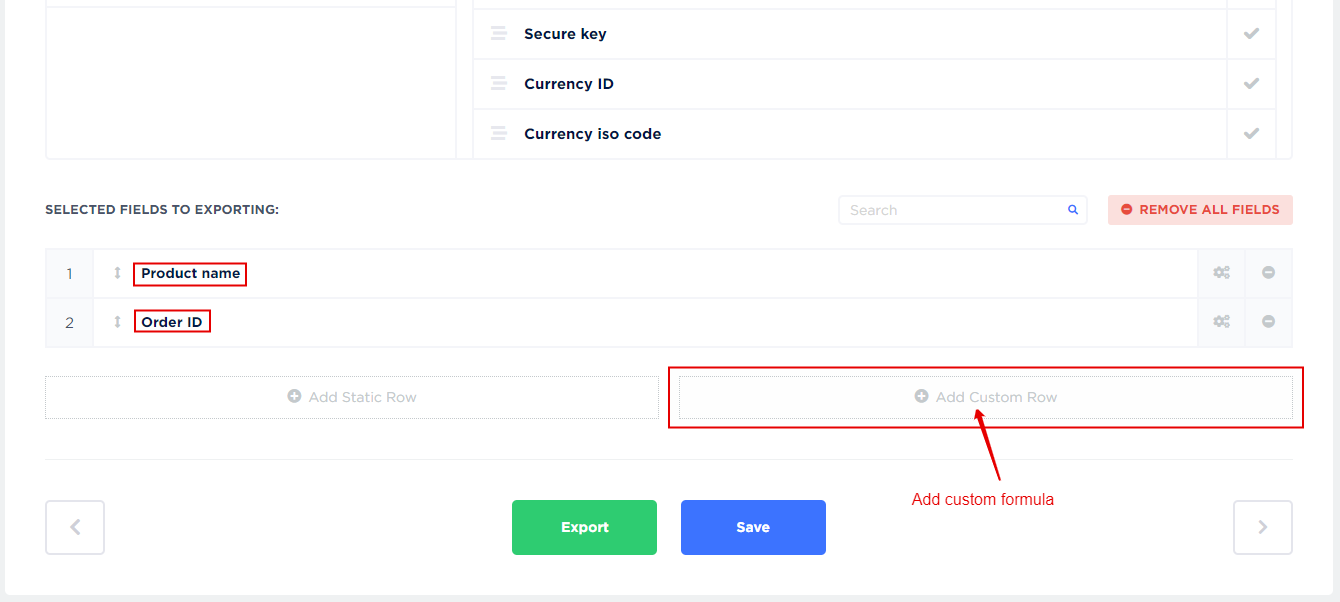
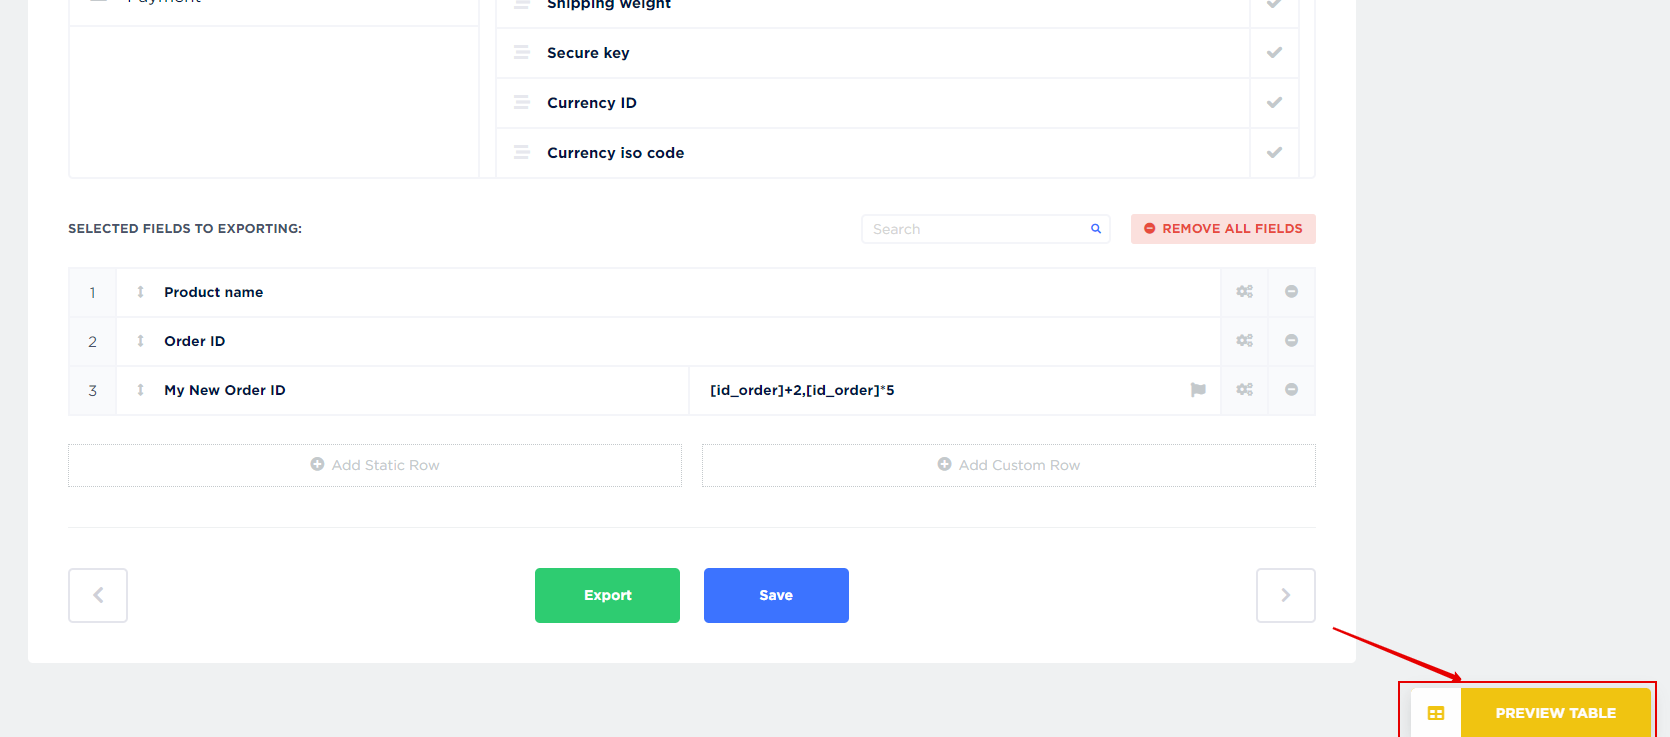
Scrolling down, you will see the fields that you have added for export. Note that the fields can be reversed - sorted as you need them to export. You can also add a static field or your own formula using the buttons:
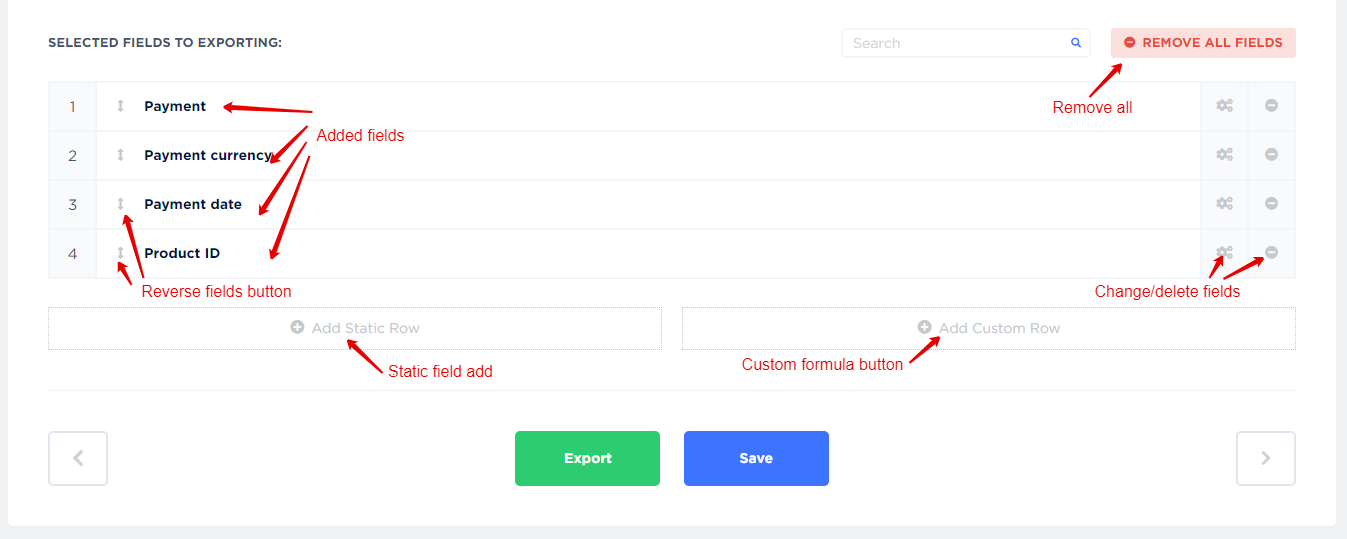
Let's try to create our first custom formula. Imagine you need to export a file that contains the following columns: Product Name, Order ID, and custom formula column - a new order ID that includes our formula. So, add the Product Name & Order ID field from the list. Click to «Add Custom Row» button:
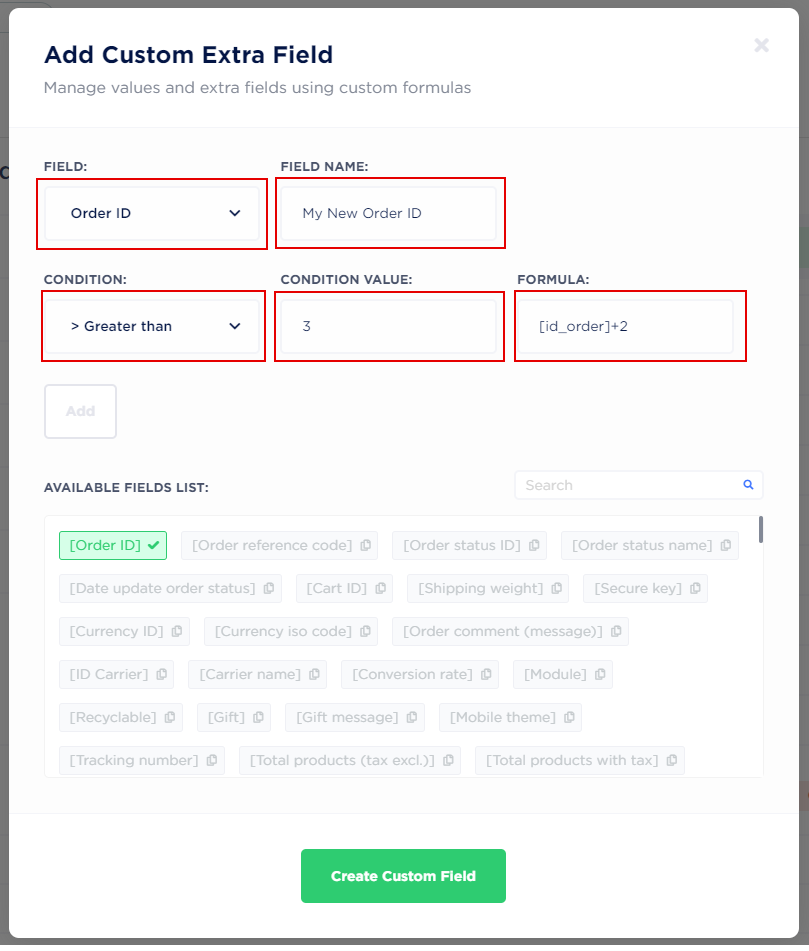
Choose the Order ID field in the «FIELD» menu, enter a new field name - «My New Order ID», choose a condition «Greater than» and type «3» (it means that all fields with the condition >3 will be created a new field «My New Order ID», enter your formula, for example: «[id_order]+2»:
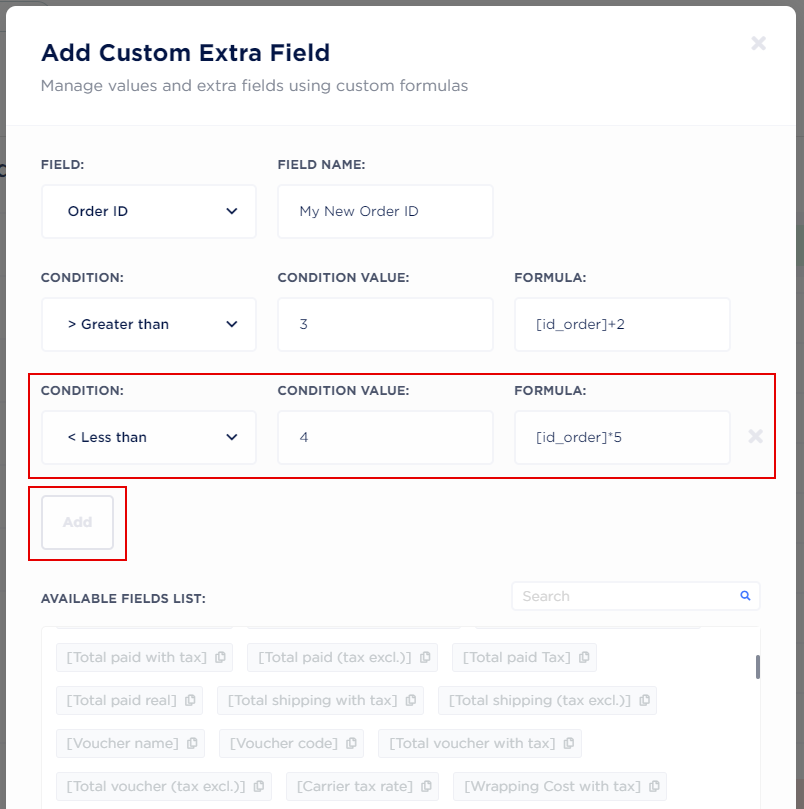
Also, you can add a new condition by clicking «Add», for example for Order ID less than 4:
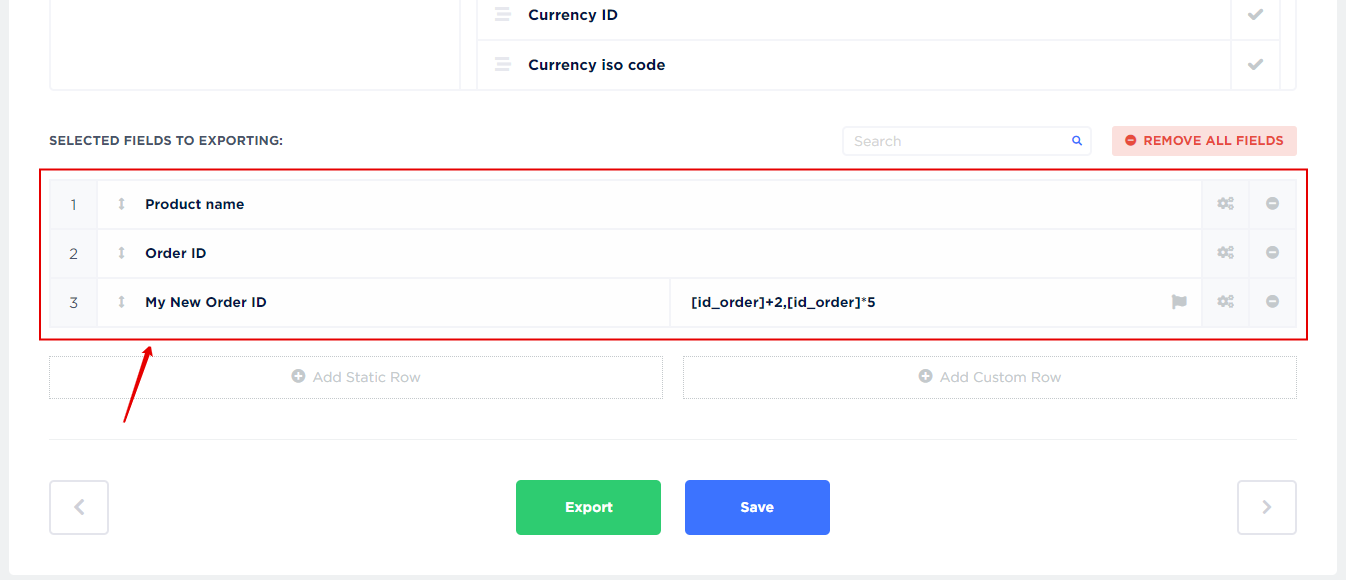
Click «Create Custom Field». Now we have 3 fields:
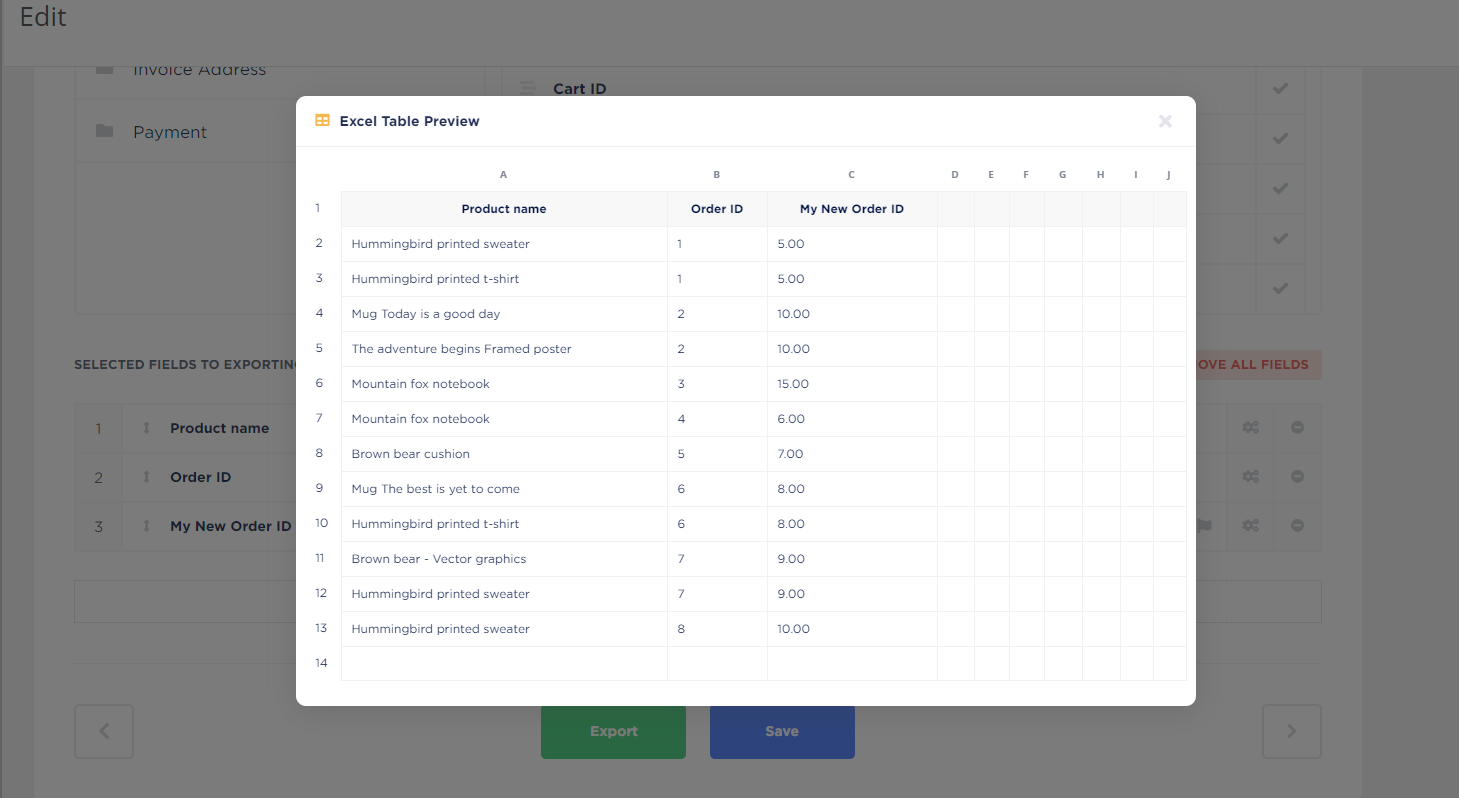
Click a «Preview Table» button to see how does it looks:
Now we have 3 columns in our exported file. Don't forget to save changes if you need to use these settings in the future. This is our preview table: